

Introdução aos atributos de eventos HTML
Neste artigo, discutiremos em detalhes sobre os atributos de eventos HTML. Eventos são as ações que são executadas como resultado da ação do usuário. Por exemplo, quando um usuário pressiona uma tecla em um teclado para ler os dados, diz-se que são eventos do teclado. Essas atividades são realizadas quando um usuário acessa um site e realiza um clique no botão ou quando uma página carrega no botão Atualizar, onde o navegador manipula as páginas, todas essas ações são consideradas eventos. Aqui, passaremos por um entendimento básico dos eventos e como ele funciona no navegador nas ações do usuário. Há um tipo diferente de evento que ocorre nas janelas inteiras do navegador, explicadas nas seções a seguir.
Os 5 principais atributos de eventos HTML

Há uma variante diferente de eventos disponíveis no HTML. E todos esses eventos têm um pequeno bloco de código nomeado como manipulador de eventos que é acionado quando a ação do evento é executada. Estes estão anexados aos elementos HTML. Os manipuladores ou ouvintes de eventos desempenham um papel importante nos atributos de evento HTML. Vamos ver os diferentes tipos de atributos de eventos que são declarados e aplicados globalmente aos elementos HTML e seu trabalho em detalhes. Quatro atributos de eventos principais são usados principalmente. Eles são:
- Evento de janela
- Eventos de formulário
- Eventos do Mouse
- Eventos de teclado
- Arrastar e soltar eventos
Vamos descrever todos esses atributos, um por um, com um exemplo. Primeiro, iremos com.
1. Evento da Janela
- onafterprintEvent: esse atributo é suportado por todas as tags Html e funciona quando uma página começou a ser impressa e possui um único script de valor. A seguir, um exemplo de código HTML. Este exemplo mostra que quando um botão é pressionado, ele imprime uma mensagem sendo impressa em uma mensagem de diálogo.
Código:
Windows onafterprint Event

Windows onafterprint Event
This attribute works in IE and Mozilla

function myfun() (
alert("Document is being printed");
)
Windows onafterprint Event
Windows onafterprint Event
This attribute works in IE and Mozilla
function myfun() (
alert("Document is being printed");
)
Windows onafterprint Event
Windows onafterprint Event
This attribute works in IE and Mozilla
function myfun() (
alert("Document is being printed");
)
Windows onafterprint Event
Windows onafterprint Event
This attribute works in IE and Mozilla
function myfun() (
alert("Document is being printed");
)
Windows onafterprint Event
Windows onafterprint Event
This attribute works in IE and Mozilla
function myfun() (
alert("Document is being printed");
)
Windows onafterprint Event
Windows onafterprint Event
This attribute works in IE and Mozilla
function myfun() (
alert("Document is being printed");
)
Resultado:
- onbeforeprint: Funciona antes da impressão. O evento é disparado após o processo de impressão. Abaixo está o código de exemplo.
Código:
body (
color: #9370DB;
background-color: #BC8F8F;
text-align: center;
padding: 20px;
)
p (
font-size: 2rem;
)

Attribute Demo
body (
color: #9370DB;
background-color: #BC8F8F;
text-align: center;
padding: 20px;
)
p (
font-size: 2rem;
)
Attribute Demo
body (
color: #9370DB;
background-color: #BC8F8F;
text-align: center;
padding: 20px;
)
p (
font-size: 2rem;
)
Attribute Demo
body (
color: #9370DB;
background-color: #BC8F8F;
text-align: center;
padding: 20px;
)
p (
font-size: 2rem;
)
Attribute Demo
gatilho para imprimir.
função get () (
document.body.style.background = "# 00BFFF";
)
Resultado:
- onerror: Esta função é acionada quando um erro é gerado enquanto nenhum elemento existe.
Código:

Olá Mundo.
função myFun () (alerta ("problema com o carregamento da imagem.");
)
Resultado:
- onload: Esta função ajuda no carregamento de um objeto e funciona bem para verificar se uma página da web está carregada corretamente.
Código:
onload event demo
function ldImg() (
alert("image loaded without error");
)
Resultado:

- onresize: esse evento é acionado quando a janela do navegador é redimensionada e qualquer elemento pode ser acionado no atributo resize.
Código:
onresize event
function cmg() (
alert('welcome to educba');
)
window.onresize = cmg;
onclick="alert(window.onresize);">
Resultado:
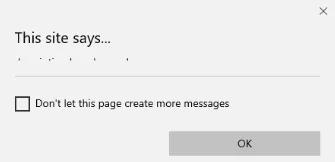
- onunload: esse evento é acionado quando uma janela da página da web é fechada ou quando um usuário sai da página da web. O código abaixo descarrega a página quando um usuário sai e lança um alerta, obrigado pela pesquisa. Às vezes, esse evento funciona em todos os navegadores.
Código:
Welcometo educba tutorial
Welcometo educba tutorial
Welcometo educba tutorial
Deixe a página.
função onfunc () (alerta ("Obrigado por pesquisar!");
)
Resultado:

2. Eventos de Formulário
Funciona com o formulário Controls. A seguir, estão os atributos que ocorrem quando o usuário interage com os navegadores.
- onblur: esse evento ocorre quando a atenção do usuário está longe da janela do formulário. O exemplo a seguir recebe entrada em letras minúsculas e, quando clica no botão Enviar, transforma a saída em maiúsculas.
Código:
Form onblur
body (
text-align:center;
)
h1 (
color:pink;
)

EDUCBA
onblur="myfunc()">
Submit
function myfunc() (
var a = document.getElementById("aaa");
a.value = a.value.toUpperCase();
)
Form onblur
body (
text-align:center;
)
h1 (
color:pink;
)
EDUCBA
onblur="myfunc()">
Submit
function myfunc() (
var a = document.getElementById("aaa");
a.value = a.value.toUpperCase();
)
Form onblur
body (
text-align:center;
)
h1 (
color:pink;
)
EDUCBA
onblur="myfunc()">
Submit
function myfunc() (
var a = document.getElementById("aaa");
a.value = a.value.toUpperCase();
)
Form onblur
body (
text-align:center;
)
h1 (
color:pink;
)
EDUCBA
onblur="myfunc()">
Submit
function myfunc() (
var a = document.getElementById("aaa");
a.value = a.value.toUpperCase();
)
Resultado:

- onchange: esse evento ocorre quando um usuário altera o elemento existente no formulário. Isso acontece quando um elemento perde o foco.
Código:
HTML onchange
select the dress color
pink
Yellow
White
Nota: selecione qualquer opção
Descreva-se resumidamente:Enviar
Resultado:
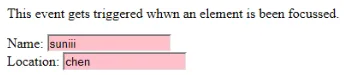
- onfocus: esse atributo é ativado quando o usuário dá atenção ao elemento em uma página da web ou quando a entrada é focada. O exemplo abaixo destaca quando inserimos uma entrada no campo.
Código:
Este evento é acionado quando um elemento é focado.
Nome:Localização:
função onfoc (a) (
document.getElementById (a) .style.background = "rosa";
)
Resultado:
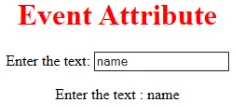
- oninput: esse evento é acionado quando a entrada é inserida no campo de entrada. É ativado quando o valor no campo de texto é alterado. Ele reflete uma vez que o valor do elemento é alterado.
HTML oninput

body (
text-align:center;
)
h1 (
color:red;
)

Event Attribute
Enter the text:

function myon()
(
var x = document.getElementById("EDUCBA").value;
document.getElementById("sid").innerHTML = "Enter the text : " +x;
)
HTML oninput
body (
text-align:center;
)
h1 (
color:red;
)
Event Attribute
Enter the text:
function myon()
(
var x = document.getElementById("EDUCBA").value;
document.getElementById("sid").innerHTML = "Enter the text : " +x;
)
HTML oninput
body (
text-align:center;
)
h1 (
color:red;
)
Event Attribute
Enter the text:
function myon()
(
var x = document.getElementById("EDUCBA").value;
document.getElementById("sid").innerHTML = "Enter the text : " +x;
)
HTML oninput
body (
text-align:center;
)
h1 (
color:red;
)
Event Attribute
Enter the text:
function myon()
(
var x = document.getElementById("EDUCBA").value;
document.getElementById("sid").innerHTML = "Enter the text : " +x;
)
Resultado:

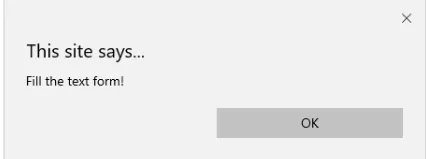
- oninvalid: este atributo chama os eventos quando o texto digitado no tipo de entrada é inválido ou permanece vazio. Este atributo do evento deve preencher o elemento de entrada.
Código:
example oninvalid Event
p (
color:orange;
)
body (
text-align:center;
)
HTML é usado para criar uma página da web
Digite o nome:Resultado:

- onreset: é acionado quando um formulário está em repouso. O exemplo a seguir diz que quando você envia o botão, um formulário é processado e novamente quando você clica para redefinir o formulário está sendo redefinido.
Código:
body (font-family:calibri;)
label (font-variant:small-caps;)
ol (background-color:#610000; margin-top:35px;)
li (margin-top:3px; padding:3px; background-color:rose; font-size:15px;)
div (position:absolute;top:250px;left:70px; font-size:1.5em;
)
Form with input to reset and submit
Enter input:
function onInva() (
alert("Input field cannot be empty!");
)
function onInp() (
var input_value = document.getElementById("iv").value;
document.getElementById("a_box").innerHTML = "Input value:
" + iv;
)
function onRes() (
alert("form is reset!");
)
function onSubmitEvent() (
alert("Form is loading");
location.reload();
)
Resultado:
- Pesquisa: Funciona quando um usuário pressiona um botão Enter.
Código:
Escreva no campo.
função myF () (
var k = document.getElementById ("valor1");
document.getElementById ("sample"). innerHTML = "o elemento de pesquisa é:" + k.value;
)
Resultado:

- selecionar: É acionado quando um texto é selecionado em uma caixa de entrada. Ele lança uma caixa de diálogo imprimindo uma mensagem de alerta.
Código:
onselect demo
h1 (
color:magenta;
)
body (
text-align:center;
)

function eduhtml() (
alert("text highlighted!");
)

EDUCBA Online tutorial
Text Box:
onselect demo
h1 (
color:magenta;
)
body (
text-align:center;
)
function eduhtml() (
alert("text highlighted!");
)
EDUCBA Online tutorial
Text Box:
onselect demo
h1 (
color:magenta;
)
body (
text-align:center;
)
function eduhtml() (
alert("text highlighted!");
)
EDUCBA Online tutorial
Text Box:
onselect demo
h1 (
color:magenta;
)
body (
text-align:center;
)
function eduhtml() (
alert("text highlighted!");
)
EDUCBA Online tutorial
Text Box:
Resultado:

- onsubmit: O objetivo deste evento é executar a ação executada enquanto pressiona o botão enviar.
Código:
Onsubmit Example
Enter name:
Email :
function myF() (
alert("The form was submitted");
)
Resultado:
3. Atributos do teclado
- OnKeyDown: é acionado quando um usuário pressiona uma tecla de seta para baixo.
Código:
Exemplo para Onkeydown.
função mykedwn () (
alerta ("pressionar a tecla está ativado");
)
Resultado:
- OnKeyPress: esse evento é acionado quando o usuário pressiona qualquer tecla do teclado. Nota: alguns navegadores não suportam pressionar nenhuma tecla.
Código:
Este exemplo mostra quando um usuário digita na área de texto que dispara um evento
>Resultado:

- OnKeyUp: esse atributo é acionado quando um usuário libera um cursor do campo de texto. Abaixo vem a demonstração.
Código:
Este exemplo transforma o caractere em minúsculas.
Preencha o nome:função mykey () (
var g = document.getElementById ("jjj");
g.value = g.value.toLowerCase ();
)
Resultado:

4. Atributos de evento do mouse
Essa ação aciona um evento do mouse quando um mouse é pressionado em um computador ou em qualquer dispositivo externo, como um smartphone ou tablet. Alguns dos eventos do mouse são apresentados abaixo:
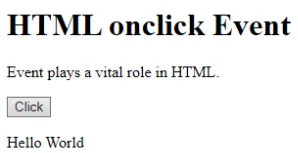
- onclick: é acionado quando um usuário pressiona o botão sobre o mouse. Um exemplo de entrada é dado abaixo para mostrar o evento enquanto clica no mouse.
Código:
HTML onclick Event
HTML onclick Event
HTML onclick Event
Evento desempenha um papel vital em HTML.
Cliquefunção oncf () (
document.getElementById ("sample"). innerHTML = "Olá, mundo";
)
Resultado:
- onmousemove: é acionado quando um mouse é movido sobre uma imagem em qualquer direção.
Código:
Event onmousemove demo
Este evento é ativado quando o ponteiro arrasta sua direção.
Texto de amostraResultado:
- Onmouseup: este evento notifica quando um usuário libera um botão em uma saída.
Código:
body (
color: "#ff0000";
height: 120vh;
background-color: #610000;
text-align: center;
)
.polygon (
float: right;
shape-inside: polygon(0 0, 0 200px, 100px 200px);
clip-path: polygon(0 0, 0 250px, 100px 300px);
height: 200px;
width: 200px;
background: linear-gradient(to bottom left, #7CFC00, #8B008B);
)
p (
margin: 30px auto;
)

HTML onmouseup Demo
body (
color: "#ff0000";
height: 120vh;
background-color: #610000;
text-align: center;
)
.polygon (
float: right;
shape-inside: polygon(0 0, 0 200px, 100px 200px);
clip-path: polygon(0 0, 0 250px, 100px 300px);
height: 200px;
width: 200px;
background: linear-gradient(to bottom left, #7CFC00, #8B008B);
)
p (
margin: 30px auto;
)
HTML onmouseup Demo
clique abaixo do objeto
função mupFn () (document.querySelector ('. polygon'). style.transform = 'scale (2.2)';
)
Resultado:

- Onmouseover: execute um JavaScript ao mover o ponteiro do mouse sobre uma imagem
Código:
Example demonstrating Onmouseover.
Mouse over
function A() (
document.getElementById("sample").style.color = "yellow";)
function B() (
document.getElementById("sample").style.color = "green";
)
Example demonstrating Onmouseover.
Mouse over
function A() (
document.getElementById("sample").style.color = "yellow";)
function B() (
document.getElementById("sample").style.color = "green";
)
Example demonstrating Onmouseover.
Mouse over
function A() (
document.getElementById("sample").style.color = "yellow";)
function B() (
document.getElementById("sample").style.color = "green";
)
Example demonstrating Onmouseover.
Mouse over
function A() (
document.getElementById("sample").style.color = "yellow";)
function B() (
document.getElementById("sample").style.color = "green";
)
Resultado:
5. Arraste os atributos do evento
Este aplicativo ajuda na janela HTML quando o usuário arrasta o elemento de entrada. Abaixo estão os diferentes ouvintes de eventos usados em HTML para armazenar dados arrastados.
- Ondrag: usado quando um elemento está sendo arrastado da página da web.
- Ondragstart : é acionado quando o usuário começa a arrastar do campo de entrada. O exemplo abaixo demonstra como arrastar a área de dois destinos.
Código:
#b1, #b2 (
float:left;padding:11px;margin:11px; -moz-user-select:none;
)
#b1 ( background-color: #FF6699; width:65px; height:85px; )
#b2 ( background-color: #808000; width:180px; height:180px; )

function dStart(e) (
e.dataTransfer.effectAllowed = 'move';
e.dataTransfer.setData("Text", e.target.getAttribute('id'));
e.dataTransfer.setDragImage(e.target, 0, 0);
return true;
)


Drag demo
Drag the box.
ondragstart = "return dStart(e)">
Drag it
welcome
#b1, #b2 (
float:left;padding:11px;margin:11px; -moz-user-select:none;
)
#b1 ( background-color: #FF6699; width:65px; height:85px; )
#b2 ( background-color: #808000; width:180px; height:180px; )
function dStart(e) (
e.dataTransfer.effectAllowed = 'move';
e.dataTransfer.setData("Text", e.target.getAttribute('id'));
e.dataTransfer.setDragImage(e.target, 0, 0);
return true;
)
Drag demo
Drag the box.
ondragstart = "return dStart(e)">
Drag it
welcome
Resultado:

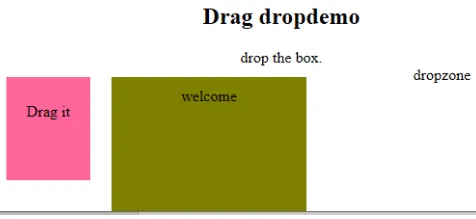
- ondrop: execute esse atributo quando um elemento arrastável for solto no elemento.
Código:
#b1, #b2 (
float:left;padding:11px;margin:11px; -moz-user-select:none;
)
#b1 ( background-color: #FF6699; width:65px; height:85px; )
#b2 ( background-color: #808000; width:180px; height:180px; )

function dStart(e) (
e.dataTransfer.effectAllowed = 'move';
e.dataTransfer.setData("Text", e.target.getAttribute('id'));
e.dataTransfer.setDragImage(e.target, 0, 0);
return true;
)


Drag dropdemo
drop the box.
ondragstart = "return dStart(e)">
Drag it
ondrop="drop(event)"
ondragover="allowDrop(event)">
welcome
dropzone
Resultado:
Conclusão
Este atributo de evento ajuda a tornar um aplicativo da Web muito mais fácil e atraente. A ocorrência diferente de ações gera vários eventos. Embora essa abordagem geralmente seja evitada, o programador gosta de aprender a função atribuída aos eventos de atributos HTML, e esses manipuladores de eventos ainda são executados para embelezar as páginas da Web.
Artigo recomendado
Este é um guia para os atributos de evento HTML. Aqui discutimos a Introdução aos atributos de eventos HTML, juntamente com a implementação e saída do código. você também pode consultar nossos artigos sugeridos para saber mais -
- Breve introdução aos quadros HTML
- Modificando o atributo de estilo HTML
- Aplicações de HTML | 10 principais usos
- As 10 melhores diferenças entre HTML e HTML5 (infográficos)
- Jogue vs Joga | As 5 principais diferenças que você deve saber
- Definir uma cor de plano de fundo em HTML com exemplo